Monday, February 11, 2013
Wednesday, January 30, 2013
Tuesday, January 29, 2013
Saturday, January 26, 2013
Finished Cushion!
Look! It's done! How many English Paper Pieced cushions have I made? Lots! Why so many? Because it's really, REALLY fun to do!
Join me in some English Paper Piecing love in my 3 hour workshop at the workroom in Toronto! I promise you, I've streamlined the heck out of my technique and you will want to stitch hexagons day and night.
The workshop runs on Saturday, March 2nd from 11 a.m. until 2 p.m.
Call the workroom at 416 534 5305 to register. See you then!
Friday, January 18, 2013
Birthday Robe
It's not always quilts and patchwork around here (though mostly it is)!
I promised my daughter a new robe for her birthday and I actually completed it in an afternoon and within a week or two of the big day!
Note To Self: Robes are a LOT easier to make than semi-medieval Halloween costumes with ultrasuede overgowns and satin underdresses. There's a reason I like making flat objects out of cooperative cotton...
Wednesday, January 16, 2013
Monday, January 14, 2013
Wednesday, January 9, 2013
Curved Piecing Project...
Here's a Work In Progress, a stab at doing curved piecing without using pins. Compared to doing porcupine-like pinning prep, these little blocks flew together in record time. I did the quilting by machine to anchor it, then went in with perle cotton for more decorative quilting.
Monday, June 25, 2012
Pre-Washing Quilt Fabric
Some quilters advocate the use of obscure special detergents or soaps and extra special fabric handling. I do not. When I get new fabric, I have no qualms about sorting by colour and throwing it in right along with my regular laundry- both washer and dryer. These are sturdy new quilting cottons, not precious antique fibres. I always wash in cold water with a cold water rinse, except for towels and sheets.
The only drawback is the tangle of fibres that will come loose through agitation and contact with the other contents of the washer and dryer. I have been just cutting or ripping off the tangles, shaking out the fabric and throwing it in the dryer.
However, I have a new method that gives me multi-faceted Win. I'm trying just a quick cold water hand wash in a plastic tub with a squirt of Soak Wash. One thing (among others) I like about Soak is that it is a no-rinse product. I do rinse, but I feel like it's not important to make sure that every speck of soap is totally rinsed out.
What I'm trying to do with a pre-wash are three things. First, get the fabric wet so I can dry it in the dryer, which will provide shrink-action if it's going to happen. Second, I'm also getting rid of the chemical sizing used in the manufacturing process, along with any cooties accumulated during the packaging and shipping process. Third, I'm checking for excessive dye bleeding.
So, I just give the fabric a swish in the Soak-y water for a minute or two and squeeze out the extra water. Then I give it another swish in clear water to mostly rinse out the soap. I wring it out- no kid gloves here!
I give it a shake and a sharp snap and throw it into the dryer with a waiting wet laundry load of the same colour.
This is a Multi-Win because-
- I've saved time, water and power with a quick hand wash.
- If colour has run badly, I can see it right there in the water and can decide what to do, which might be chucking it out.
- The fabric is significantly less thready and tangly.
- I still get the heat-shrinkage by piggy-backing my quilt fabrics with a load of laundry I'm already drying.
Monday, June 18, 2012
Olde Country Shopping
I've been in Canada for quite some time, but I'm still a Michigan girl. So when we travel back to the Olde Country, a few side trips for stocking up on my favourite Michigan essentials are a must.
Jiffy baking mixes? Check! Giant pretzel rods and oyster crackers? Check! The indescribably delicious Detroit delicacy known as Sanders Milk Chocolate Hot Fudge Sauce? Oh yeah. This is "eat right out of the jar" good stuff. And don't forget the Vernor's Ginger Ale!
The other major non-grocery destination is Joann Fabrics. The store I go to always has a very good selection of quilting fabric, and I cross my fingers on hitting a sale on already (usually) less expensive fabric.
As an added bonus, Joann carries an exclusive line of fabric by Denyse Schmidt. I bought some, of course (the four fabrics on the left), but what caught my eye was this folded and beribboned yard of DS Quilts fabric...
Hey! Four different Fat Quarters printed all on one chunk of fabric! Yes, please!
Now it's all in the wash en route to The Stash. Can't wait to work with it all. Glorious!
Jiffy baking mixes? Check! Giant pretzel rods and oyster crackers? Check! The indescribably delicious Detroit delicacy known as Sanders Milk Chocolate Hot Fudge Sauce? Oh yeah. This is "eat right out of the jar" good stuff. And don't forget the Vernor's Ginger Ale!
The other major non-grocery destination is Joann Fabrics. The store I go to always has a very good selection of quilting fabric, and I cross my fingers on hitting a sale on already (usually) less expensive fabric.
Hey! Four different Fat Quarters printed all on one chunk of fabric! Yes, please!
Now it's all in the wash en route to The Stash. Can't wait to work with it all. Glorious!
Friday, June 8, 2012
New Sewing Box
Ok. Prepare for Extreme Sewing Nerdiness...
This is what I was using for my portable sewing kit that I kept my stuff in for teaching classes and generally corralling my tools- a pencil case from Staples.
This is what I was using for my portable sewing kit that I kept my stuff in for teaching classes and generally corralling my tools- a pencil case from Staples.
Meanwhile, while teaching, I have witnessed a parade of super-cute hinged tins and other adorable boxes that folks use to contain and tote their sewing supplies.
I decided it was high time to liberate my inner Sewing Nerd. After a trip to Michael's, the hardware store and my Stash, here's what I came up with...
Yes, it all fits in the box.
Melody Miller scraps!
Tuesday, June 5, 2012
Jubilee Pineapple!
In honour of the Diamond Jubilee of Queen Elizabeth II, I give you...
the Jubilee Pineapple Log Cabin Cushion!
God save The Queen!
God save The Queen!
Wednesday, May 30, 2012
Tutorial: Curved Bias Quilt Label
Hi! I've been sewing my brains out lately and it's time to catch up!
Here is my new favourite way of making a quilt label. I've used it three times so far and I love the way it looks. Here's how...
Cut a 1" wide strip of your label fabric on the true bias, and long enough to fit your label information plus a little extra on each end.
Carefully iron it right side up to a scrap of freezer paper on the shiny side. This stabilizes the fabric so it doesn't shift as you write.
With a Pigma Micron Pen, write your quilt information in the centre of the strip. Write smallish- the edges are getting turned under. The finished label is 1/2" wide.
Now, I run the strip through my handy Clover Bias Maker (1/2" wide finished). If you don't have one, you could just carefully press the edges under, but the Clover Bias Maker is really quick and neat (and super fun!).
Then, with the right side up, gently pull the strip into a curve while you press it with your iron.
Position the curved label in a corner on the back of your quilt, with the ends hanging a bit past the edges of the quilt. Pin and hand appliqué in place. (Just stitch the two long sides; the short ends get caught in the binding.) Trim ends flush with quilt edges.
Attach your binding however you like. For the binding in the photo, I did the first stage of stitching attaching the binding to the back of the quilt, then folded it over and machine finished it from the front...
...and there you have it! A neat, easy and unusual way to label your quilt. I hope you try it!
Wednesday, March 21, 2012
Tuesday, March 13, 2012
Black Wedding Ring
Wednesday, February 22, 2012
Pillow Back = Shirt Front
Wednesday, February 15, 2012
Eye Candy
Thursday, February 9, 2012
Kitchen Art!
 Another batch of UFOs made into something...
I found some lonely yo-yos in a bag while reorganizing my sewing room. They are lonely no more! The flower stems were made with the help of the wonderful Clover Bias Maker gadget, and I drafted the vase and freezer paper foundation pieced it. The whole thing is backed with flannel to give it some body, and I did some simple running stitch embroidery to add a bit of detail.
I hung it in the kitchen, and somehow it looks like it has always been there.
Monday, January 30, 2012
Thursday, January 26, 2012
Scissors Completed!

Here it is! Finished!
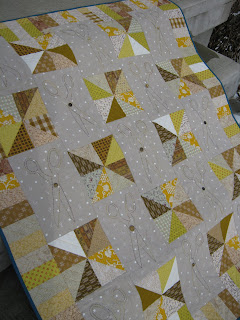
Another scrappy backing; check out the huge chunks I used up from the Stash. I used the quilting bar attachment on the walking foot that came with my machine, and I really enjoyed not marking parallel lines. I added a bit of free motion quilting action on the scissors blocks, and finished it off with some old buttons and a contrasting blue binding.
Time to cut on a new quilt and take a little break from the UFO pile…
Subscribe to:
Posts (Atom)


