Thursday, December 22, 2011
You Look Familiar...
Anna Griffin's "new" fabric...
...compared to the Happy Homemaker by Darlene Zimmerman for Kaufman Fabrics some years back from my collection...
They are "swirl for swirl" identical except in colourways. Is it legal? Was the scale of the design tweaked just enough to make it so? Is fabric design this unregulated? And can't Anna Griffin just design fresh? Come ON.
Sunday, December 11, 2011
Kanzashi!
Not a whole lot of time lately to sew, but I squeezed in some craftiness this week after the arrival of this wonderful book, "Kanzashi In Bloom." I want to make a hundred of them, then go downtown to a specialty button shop and spend a few hours selecting just the right button centre for each one...
Saturday, September 24, 2011
The Grid
Look! I'm in print!
A weekly magazine here in Toronto called me up last month and asked if I knew anyone who might be able to design and stitch the title of their next issue on short notice. Yes, I did. How about me?
A few days later, the finished cross stitch was packed up and sent to the photographer by way of courier. A few days after that, it appeared on the cover of The Grid magazine in stands all over the city! As I was working that morning, a search posse (family) was organized and many issues were scooped.
Hooray!
(And no, I did not stitch the work in that wooden hoop! I never use circular hoops with Aida cloth; they would have left really bad hoop marks. I used a Q-Snap frame. Dang those stylists!)
Saturday, August 27, 2011
CQA 2011
This post is extremely overdue. Prepare for horn-tooting...
I entered a quilt called "Album" in the Canadian Quilters' Association National Juried Show this past spring and won Second Place in the Excellence in Original Traditional Wallquilt category! There had been a two year gap since the last time I entered, so this win seemed extra important and special to me. I was glad the show was fairly close to home this time (if a two-hour drive is close) and also that my dear quilty friend Michelle Dunn of Kallisti Quilts was there to share my excitement with me.
Friday, June 17, 2011
Houses!
I avoided Foundation Paper Piecing like the plague for a long time. Picking out all the paper after sewing everything was a mind-numbing exercise in tedium. When I'm finished sewing, I want to be DONE. I made a tiny little sample or two, and chucked them aside for the maddening irritation they caused.
I have since had a change of heart. Karyn at the workroom sent me a link to the Twiddletails website. I clicked on it with scepticism.
It was a complete game changer.
This version uses freezer paper as the foundation! You don't pick out bits of paper for hours- you just peel it away! Genius. AND you can see where you are sewing. AND you have nice, neat and even seam allowances.
I designed Houses! and had a really fun time making it. I was so excited that I slammed out all the house blocks in a weekend. And now I'm designing more...
Sunday, June 12, 2011
Saturday, June 11, 2011
A Letter
Dear Baby-Shower Givers,
We share in the happy anticipation of the arrival of this special bundle of joy with you! This baby couldn’t ask for more wonderful parents. However, two weeks notice is insufficient time to inform those guests who might be quilters. We want to make this baby something cozy, colourful, and comforting, and we need time to make this token of our affection. Given the time constraints, we must pare down our artistic vision.
Squares. The quilt will be squares. Not adorable appliqué, nor whimsical pinwheels, or anything else that can’t be cut and sewn marathon-style. They will be lovely, thoughtfully selected and placed squares, but squares nonetheless. We hope you understand.
We will see you at the shower, on time and with gift wrapped in a bulky, tell-tale bundle. When it’s opened, we hope to please the expectant mother, and some ooh’s and aah’s would be nice, too. And tears of happy joy at the awesomeness of handmade love in blanket form wouldn’t hurt either.
Respectfully,
Johanna Masko and Daughter
Friday, May 6, 2011
Tutorial: Do-It-Yourself Quilt Labels
Here's a nice way to make a quilt label- quick, easy to do and professional-looking.
When I was planning this one, I knew I wanted a hand-written look for the title, but my regular hand-printing was not going to give me the neat and tidy appearance I was going for, as anyone who had tried to read my scribbly notes can tell you. So, I did a hand-written, scripty title in pencil (using a penciled-in bottom guide line), and tweaked it until I liked it. Then I went over it with a felt tipped marker.
Then I used the computer to type my name, city and year the quilt was completed. (Of course, you could use the computer to do the whole thing, including the title.) After that, I tried out different fonts and sizes to see which one I liked, then printed my favourite. You can tape your title to the computer-printed info and decide on your line spacing.
I pressed a big scrap of muslin for my label. Then I cut out an oversized chunk of freezer paper and pressed it with a dry hot iron to the back of the muslin, shiny side down. This keeps the fabric smooth, stable and flat so you can trace your lettering.
If it's daytime, tape your lettering to a window, then tape your paper-backed muslin on top and trace it. Or, do what I did (because it was evening and I didn't want to wait) and rig up an improvised "light table" with a cheap-o piece of picture frame glass and a table lamp with a lamp shade (to rest the glass on) and a fluorescent bulb.
I used a black Pigma Micron permanent pen with a 0.25mm line width.
When your ink is dry, peel off the freezer paper, cut to size, turn under your edges and applique to the back of your quilt!
Tuesday, March 29, 2011
Taming Your Selvages
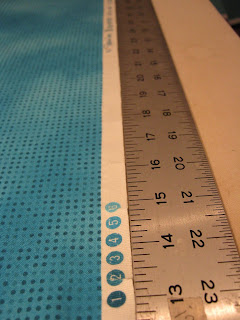
I always pre-wash my fabrics before they enter The Stash, and sometimes I notice that the selvage will shrink more than the rest of the fabric. (This is one of the reasons to not use selvages in your patchwork!) Even after pressing, I end up with a gently curved edge along the selvage, which I don't want. I want a nice, straight edge to start with so all my long cuts parallel to the selvage are also nice and straight.
Now, if I just plunk my rotary ruler down and trim off that wonky curved edge as it is, I will end up with a cut edge that is curved in the opposite direction. Still not what I want.
To fix this problem, there is a simple solution. Snip into the selvage every few inches with scissors, for the whole length of the fabric edge. This will relax the shrunken edge and, after you re-press it, your selvage edge will lay straight.
Now you can trim off the selvage and be sure that your freshly cut edge is straight, too.
Friday, March 25, 2011
Un-sexy Scraps
Here is a confession. No. Strike that. A declaration- I do not have a gorgeously arranged, carefully organized scrap stash.
Why am I mentioning it at all? Just a little reassurance that beauty can indeed be made out of chaos. There are as many kinds of quilters as there are quilts, and some are highly organized, and I totally honour that. I am organized in my own way for the bulk (and I mean BULK) of my stash, but scraps? They get collected in a reusable shopping bag that hangs from the back of my sewing chair, and then sometimes, for fun, I dump them all out on the floor and sort by colour. Then they get stuffed back into bags (reused Ziplocs, old gift bags) that roughly represent a broad colour group and then they wait for me to paw through looking for a gem.
I have mentally established a minimum size that I will use to determine if a scrap is actually useable. That size is about the size of a playing card. If it does not meet this minimum size, out it goes. Will I ever use a skinny selvage that I trimmed off a fat quarter? Really? No, I won't. I'm all for frugality, but even my thriftiness has its limits. I don't want bags of miniscule scraps lurking around making me feel guilty.
And that is my highly specialized system for Scrap Management.
Monday, March 21, 2011
Stitchy
I've been on an embroidery rampage lately.
I got onto cross stitch a few years back, as my go-to stitching during times of "lost quilting mojo." It happens, and it seems to happen seasonally, right around the end of June and lasts until Labour Day. Anyway, feeling the need to branch out and embrace all that might possibly involve the use of embroidery floss, I've begun to do "free embroidery" or "surface embroidery."
I can tell you: it is a LOT of fun. The satin stitch, especially, is very gratifying, both in the execution and in the finished stitches.
This little hanky ended up with my mom. The design is from "Embroidery Companion" book by Alicia Paulson. Lovely book.
(I do some work as a custom framer, and any needlework that comes through the shop needing to be stretched and framed is referred to as a "stitchy/pin" on our work order sheets. So, this little embroidery is a "stitchy.")