Tuesday, August 10, 2010

Stuff With Scraps #6...


...well, not really scraps, but chunks of fabric that I still like, but I'm not in love with.

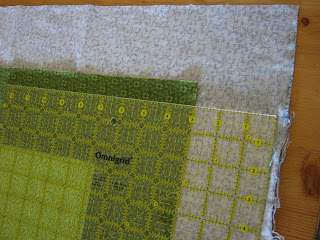
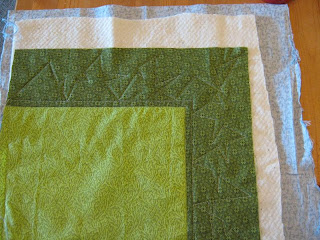
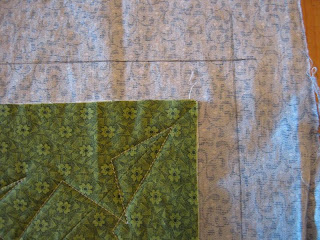
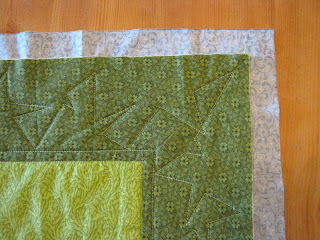
I am a major fan of the Scrappy Backing. I get to use up fabric that I already have, and create an interesting and unexpected back for my quilt. I dig around the Stash and find chunks that are sort of similar in overall colour and tone, and then I just cut the edges straight and sew it all together. I just keep on going until I can fit my quilt top on it with a little extra all around.

Do I measure it all out and meticulously plan it? No, I do not. I literally throw the fabric chunks on the floor, mix and match and start trimming and sewing.

Check out how many chunks of fabric I used up! And that, my friends, lets me buy more delicious fabric with a clear conscience.


Tuesday, June 8, 2010

Tutorial: Tabletop Quilt Basting


When I have the time and I plan ahead, I have the luxury of basting quilts on the great, big, perfect-height cutting table at the workroom.

However, there are times when I want a top basted right now, and the tops are often too big to fit entirely on the surface of my dining room table. No matter! I baste it anyway and here's how I do it.

I put the extra leaf in my table; it's an old IKEA table that's been used and abused over the years. Though we still love it, it is already a bit scarred on the surface so I have no qualms about sticking in my safety pins and adding to the rich assortment of scratches that are already there. I'm adding "patina." See how that works?


So, I press my backing on a tabletop ironing board (handy!) and then I tape the backing so the length of my quilt will fit on my table, but one edge hangs over the side of the table. I tape the three sides of the backing, layer and carefully smooth out my batting, then layer on my quilt top. (I'm working with an Amish-style Bars quilt top that I just made. It will be quilted in red and blue, with a blue binding! Anyway...) I smooth out the top and proceed with the safety pins.


When my pins are all in, I thread-baste the one continuous long edge I have available to me.


Then, I untape the backing and simply slide the whole thing over so the extra un-basted part is now resting on my tabletop, and the now-basted part is hanging over the other side of the table.


I peel back the top and batting and smooth down and tape the backing on three sides.

Then I carefully smooth down the batting, and then unfold the top over it and smooth it down, too. (Did I mention the "smoothing" part?)


Now I finish up my pin-basting and thread-baste the other full side of the quilt sandwich.


Almost ready! Just untape the backing from the table and swing the whole thing around so you can thread-baste each shorter side in turn. Trim your batting and backing down a bit if you like.


(I have used this technique for even larger quilts, too. I do the middle third of the quilt, then do the outer thirds one at a time. Make sure that your quilt sandwich is supported on a couple of chairs when you do the outer thirds.)

You now have a fully-basted, smooth quilt sandwich that is ready for quilting! And you did it without killing your back by doing it on the floor (ouch!) and you didn't waste valuable sewing time waiting for the perfect basting table to become available.

See? You can do it! Now get quilting!

Thursday, June 3, 2010

Tutorial: Using the Backing as the Binding


Sometimes you just want to get the quilt done. Here is a fast and dirty way to bind a quilt- just make sure that what you've chosen for the back will also look good as the binding, because in this method, they are one and the same. In these photos, I'm just going to show you part of an edge and a corner. Ready?

Cut your backing a few inches larger all around than the top, as usual.

Layer it up and quilt it! BUT, don't quilt past the edges of the top...

...because the batting gets trimmed away. With scissors, trim the batting so that it is flush with the edge of the quilt top.

Pretty already! Now, using a grid ruler, mark the wrong side of the now-visible backing with a line that is 1 inch from the cut edge of the top/batting.


Now trim the backing along that line. You can skip the rotary cutter and just use scissors.


Okay! Now take your quilt to the iron, and carefully press that little 1 inch wide exposed backing in half, so that the raw edge of the backing touches the raw edge of the top/binding. Just press the backing fabric; do NOT press on your quilted top/batting. See how I'm scooting the iron just along that edge? You don't want to compress your gorgeous quilting.

Press in half right to the end.

Now, you're going to fold that pressed edge over your quilt top, covering the raw cut edge. Pin in place.

Go ahead and pin the whole side to the corner.

Fold the corner down on the diagonal, like this...

... and give a little careful pressing. Don't squish your quilting! Now, fold the next section of raw edge backing in half again, and do the careful pressing along the next side.
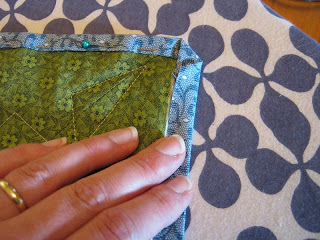

Now again, fold this pressed edge over the raw edge of the top/batting and pin in place.

Look at that pretty little mitered corner! Nice! Now you can stitch down the edge either by hand for an invisible finish, or you can take it to the machine and edge-stitch it in place.

I'd be inclined to machine-stitch, since that would give you a nice stitched edge finish on the back as well. Plus, it's faster, and I just want to get this thing done! TODAY!


Sunday, January 3, 2010

Kaleidescope!

Here I am!

How long has it been? Never mind...


If you're in the Toronto area before March 21st, you MUST see the "Kaleidescope" exhibition of antique quilts at the Textile Museum of Canada! I saw it (experienced it, soaked it up like a sponge) a couple weeks ago, and I must tell you: You will swoon. Seriously.

Victorian-era crazy quilts, mind-boggling English paper pieced masterpieces with thousands and thousands of patches, classic appliqued quilts- all lovely, all stunning. The quilts are grouped together by type, and there are really interesting and informative placards throughout. I liked the fact that laminated sheets with the details about each quilt were provided in each section. You can grab one and walk around with it. Nice!


In a section called "Variations" were a number of examples of the classic Log Cabin design. Americans associate it with American pioneer culture and call it Log Cabin, while Canadians also lay claim as originators, calling it Canadian Loghouse, etc... What I found particularly fascinating was, according the information presented with the quilts, there was a mention of the Log Cabin design in a publication from 1897, which suggested it might be more properly called "Egyptian" or "Mummy" since this lattice-like pattern is evident in linen mummy wrappings.


Friends, I give you the cover of the November 2009 issue of National Geographic... Pet mummies!!


And more inside...


See there? How cool is that?!

I can't decide which is more fascinating- that this Log Cabin-like design existed all those thousands of years ago in pet mummy wrappings (which I never knew about until my issue arrived in the mail) or the fact that someone in North America in 1897 knew enough about mummy wrappings to draw the comparison! It's not like they could have watched a mummy documentary on the Discovery Channel! How did that little tidbit of Egyptology find its way across the ocean way back then?

Okay! Back to the present! By the way, there is an exciting event to go with this very special exhibition hosted by the workroom. Karyn has arranged for a private tour of the show, along with an exclusive peek into the Textile Museum's stored collection of quilts! I know!! Check out either the Textile Museum of Canada's website of the workroom site (click on classes). The tour is January 31st, a Sunday.

Go and see it!